HVAC Helper Sensors in Home Assistant

In the last post, I introduced the idea of automating my HVAC system to go beyond the stuff that is capable out of the box and some of the reasoning as to why I wanted to do that instead of going with the mostly fine approach of just using the default behavior. Yeah, I’m still questioning that decision…
Any rate, today we’re gonna start getting into the sensor set up. There’s a bunch of stuff that we are gonna need, so let’s take a look at the requirements, the nice to haves, and start identifying which sensors will give us the needed information.
Some prerequisites though: I’m assuming you’re familiar with Home Assistant or will gain that knowledge elsewhere so I won’t be going through basics. Personally, I use YAML for the vast majority of configuration, so that’s how I’m going to be presenting it. Almost everything (heck, probably everything) I show here can be done through the UI, but I’m not gonna get into that; the Home Assistant documentation and forums will almost certainly be able to help you. Also, finally, I use a package-based config system so if my config files look different to yours, that’s why; it will work just fine without packages as long as you structure the config properly, which is out of scope for this post.
Must Haves
Per-room temperature settings
This only applies if you have a way to separately target each room, e.g. with a Flair smart vent system. If you don’t have something that enables this, then there’s no need to have separate room temperatures and you can just rely on a single temperature setting for the entire zone.
This is as simple as creating an input_number for each room to track.
1
2
3
4
5
6
7
8
input_number:
  office_target_temp:
    name: Climate - Office Target Temp
    min: 65
    max: 85
    mode: slider
    unit_of_measurement: °F
    icon: "mdi:thermometer"
Time-based temperature settings
Without changing temp settings, there’s really no reason to do any automation, right? So now we’re gonna add a few things to set up changing temps.
Temp settings
First, we need the actual setting. On modern thermostats, these are temperature targets like “Home”, “Away”, or “Sleep”. We’ll do something similar so if we change the desired temperature for a setting we won’t have to change it everywhere it’s used. Also, it’ll be easy to build a dashboard or use automations to quickly change the setting if we want. For now, we’ll just use two settings: one for the default temperature, and one for while the household is sleeping. You can add as many different settings as you like, but two will give you the gist.
1
2
3
4
5
6
7
8
9
10
11
12
13
14
15
16
input_number:
  climate_default_temp:
    name: Climate - Default Temp
    min: 65
    max: 85
    mode: slider
    unit_of_measurement: °F
    icon: "mdi:thermometer"

  climate_bedtime_temp:
    name: Climate - Bedtime Temp
    min: 65
    max: 85
    mode: slider
    unit_of_measurement: °F
    icon: "mdi:thermometer"
With these created, you’ll have to set the value for them. I have a dashboard which contains all the different comfort settings for my house, and that’s probably something you’ll want long-term. If you don’t want to do that now, you can use Developer Tools to set the current state of each of the temp settings.
 Don’t @ me about light mode
Calendar
Next, we’ll need a calendar to keep track of when we want these things to change. You can certainly just do this all with time triggers in an automation, but I find calendars far easier to manage and visualize. You can’t create a calendar in YAML, so I used the Local Calendar integration and created a calendar for each room. Separate calendars isn’t strictly necessary, but you don’t get to the “overengineered” state without… well, overengineering.
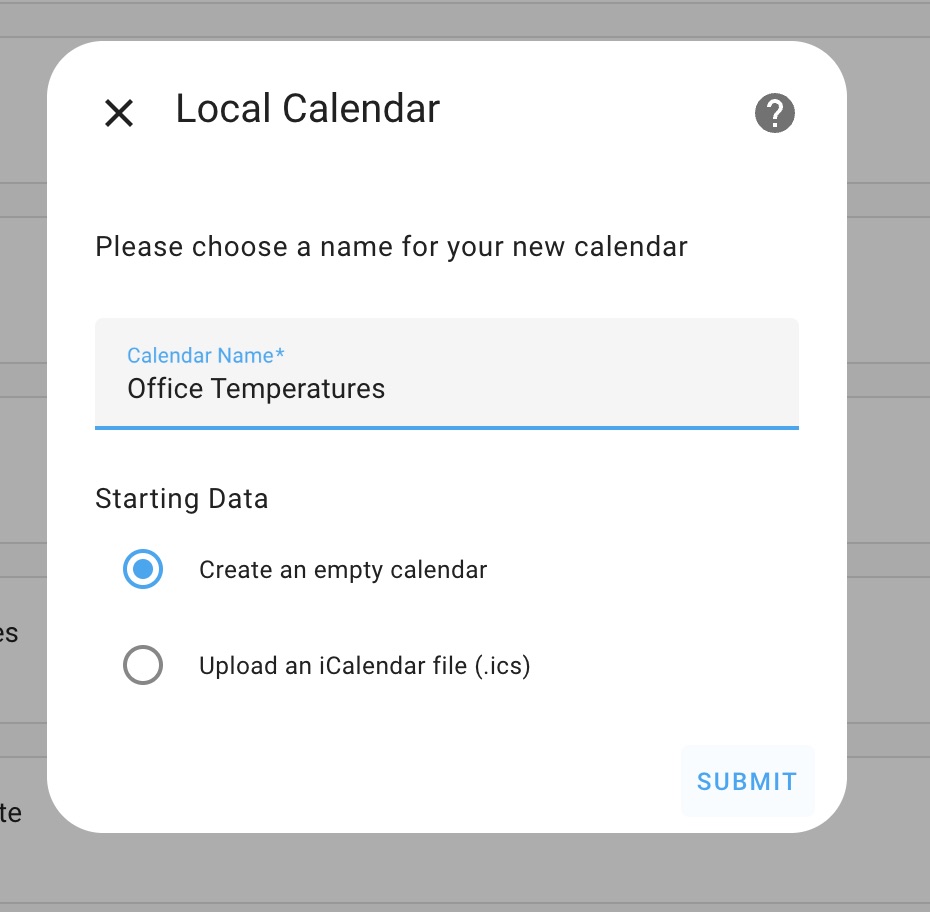
Now you should be able to go to the Calendar page (a default dashboard in Home Assistant) and add events indicating when you want the temp settings to happen. The goal here is to use the same name as above, e.g. “Bedtime”. We won’t specifically add “Default” since that will be the temp setting if no other setting is active.
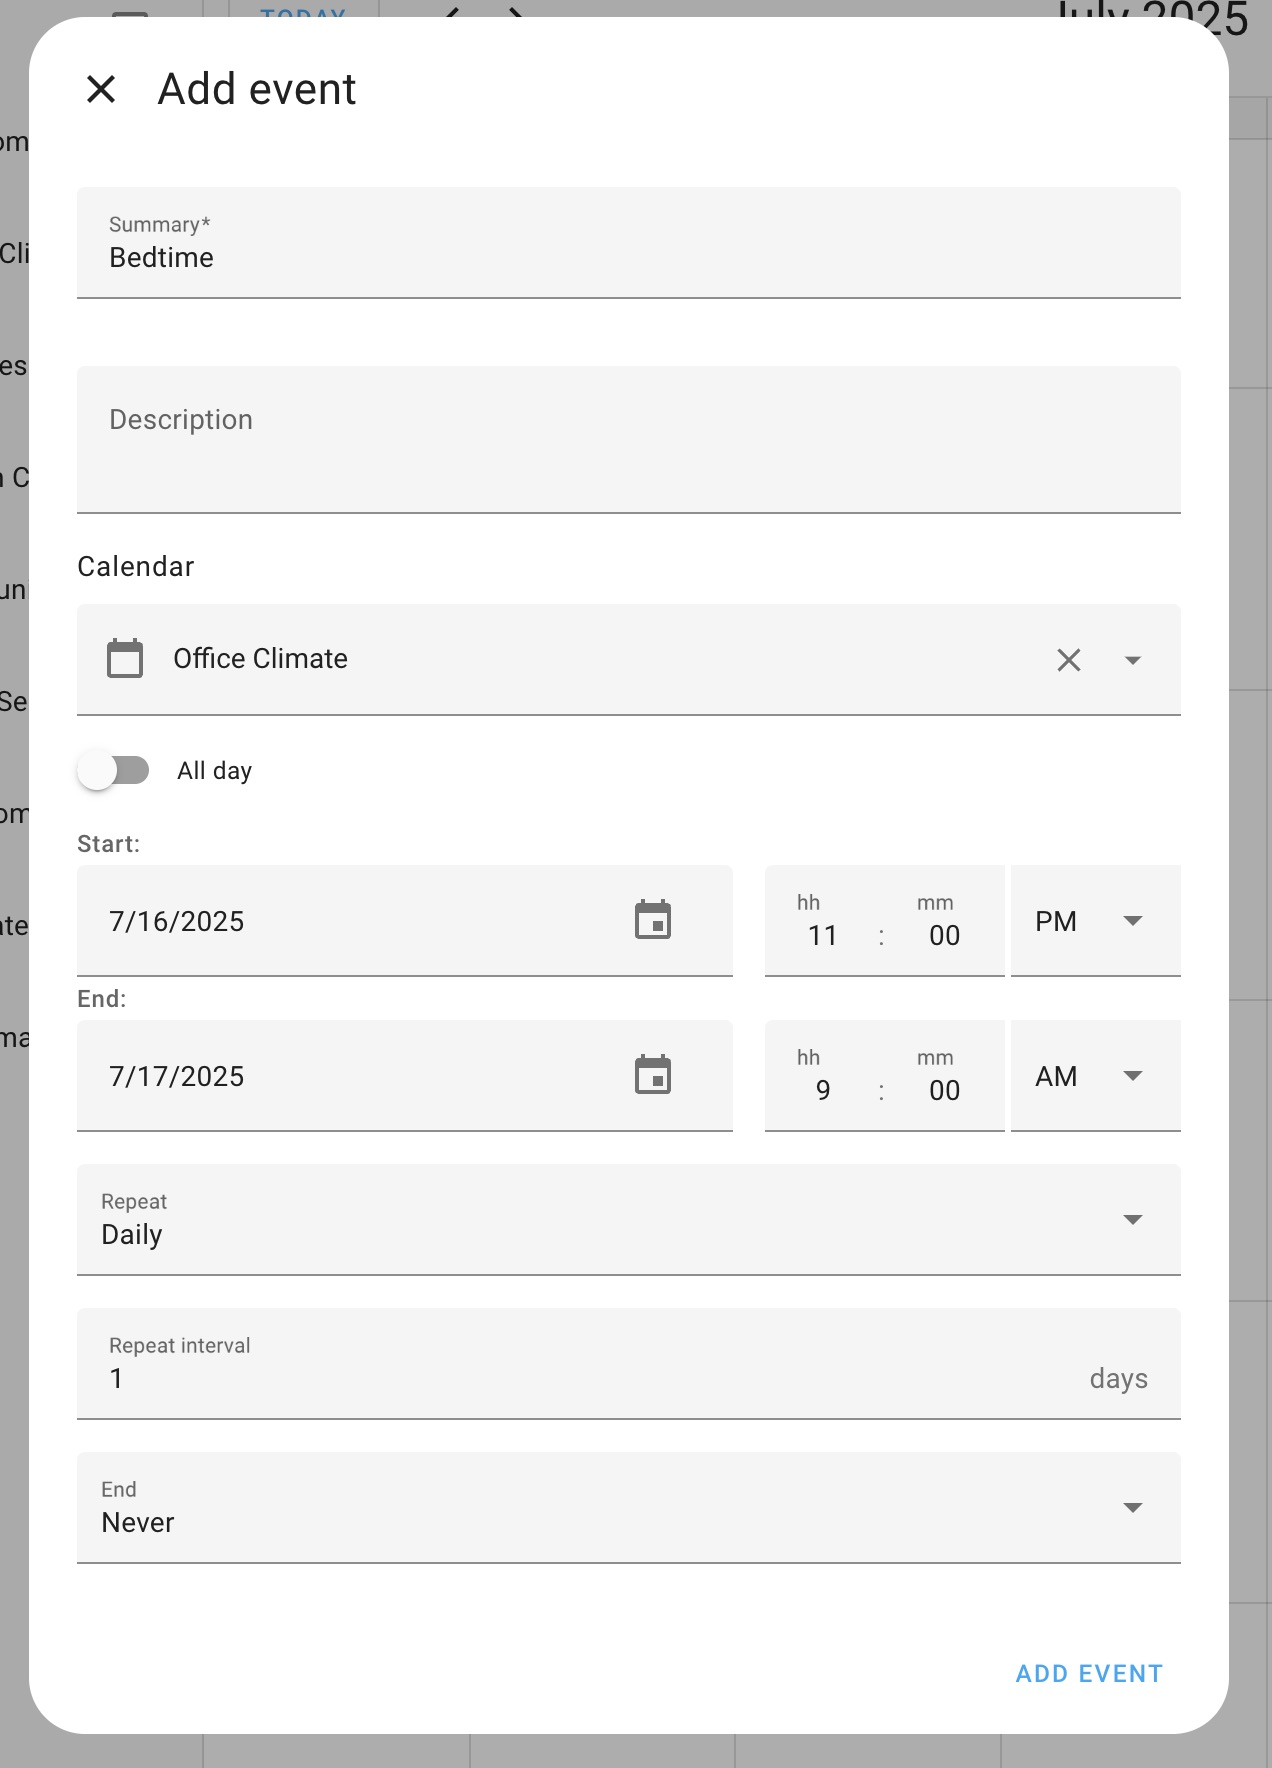 Adding the event
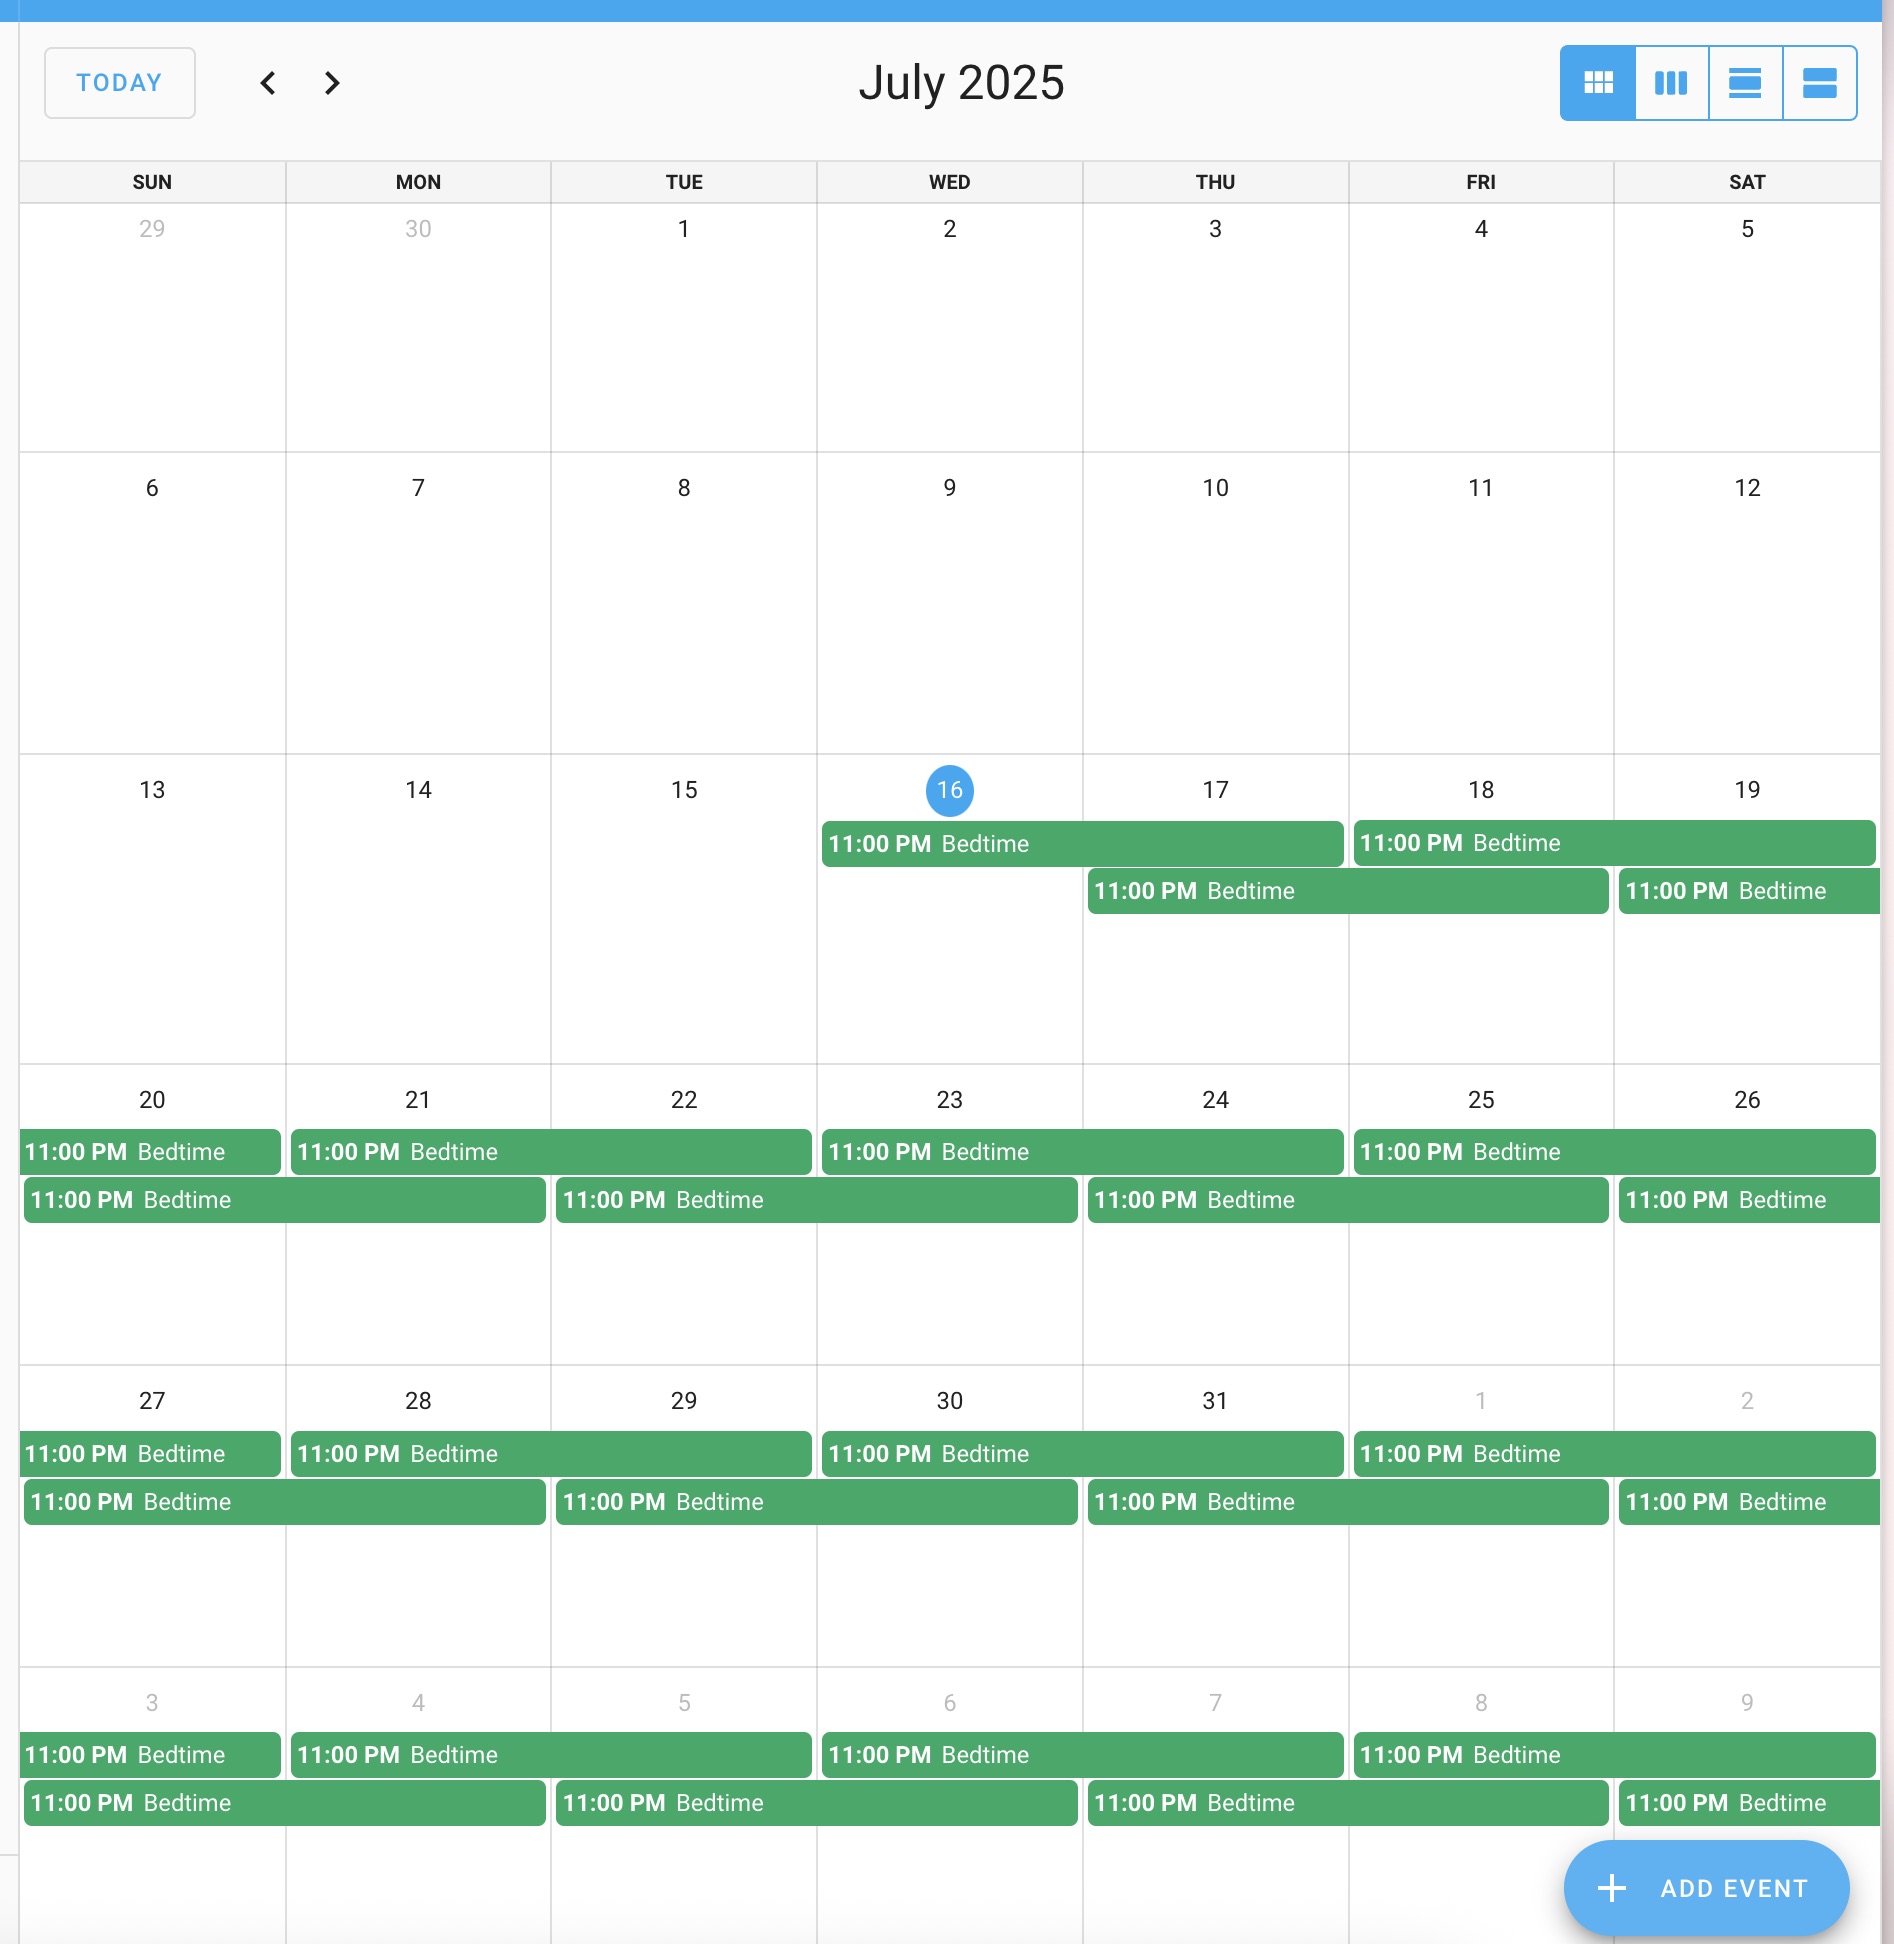 Your calendar should look like this
Automation to connect them
Finally, we need to build an automation which connects the calendar events to the target temps. This is the glue that says “it just turned to bedtime; change the target temp for the room(s) to be the temp indicated by the setting”.
First off, let’s use the triggers for the Local Calendar integration as the main driver for the automation.
1
2
3
4
5
6
7
8
9
10
11
12
triggers:
  - alias: If a scheduled temp starts on the office schedule
    trigger: calendar
    event: start
    id: office
    entity_id: "calendar.office_climate"

  - alias: If a scheduled temp ends on the office schedule
    trigger: calendar
    event: end
    id: office
    entity_id: "calendar.office_climate"
All this is saying is “whenver an event starts or stops on the office climate calendar” According to the documentation, we need the event for calendar triggers, unlike “just listen to any time the state changes” for state triggers. Thus, each calendar will need this pair of events.
Eventually, we’ll add some conditions to the automation which control when the actions run, but for now we don’t need to add any conditions
1
conditions: []
Now, this is a little out of order, but I want to cover it before we go into the actions. The way the calendar works is that each start event is a separate entry that comes in; thus, if you have three calendar events starting at 11am, you’ll get three different events, each with their own properties. Since we want all of them to be processed, we’ll run this automation in queued mode.
1
mode: queued
This is also important because, if you have one event ending and another beginning (say at 11am), the automation will process the end entry of the event which is ending before the start entry of the event which is starting, which is the desired behavior; other modes will end up either processing the events at the same time introducing a race condition, or completely ignoring the second one that comes; neither of these are desirable for consistent behavior.
Now, on to actions. We’re going to need to gather some information and then perform the actual update. So… first things first, we want to get the mode we’ll be going in to. (We’ll set several variables in this same block, but will describe each individually.)
1
2
3
4
5
6
7
8
9
actions:
  - alias: Get the mode from the calendar event which triggered the automation
    variables:
        target_mode: >-
        {% if trigger.calendar_event == "end" %}
            default
        {% else %}
            {{ trigger.calendar_event.summary | lower }}
        {% endif %}
Next, we want to figure out which zone will be affected. You’ll create a new entry for each room input you’ve created; the trigger id is pulled from the id property of the triggers defined above. Given the above trigger ids of office (yes, you can duplicate), this block of code says “look in zones for the key office and, if it’s found, return the value - in this case input_number.office_target_temp”. If you only have one zone, this is complete overkill, but I’m going to have at least four zones and this makes it possible to manage any number of zones very easily.
1
2
3
4
5
6
7
variables:
  target_zone: >-
    {% set zones = {
        "office": "input_number.office_target_temp"
    }
    %}
    {{ zones.get(trigger.id) }}
Last, we need to get the target temp which corresponds with the calendar event. This is why the naming is important; we’re just blindly creating the name of the input_number from the calendar event. If this doesn’t match, it won’t work.
1
2
3
variables:
  target_temp: >-
    {{ states("input_number.climate_" + target_mode + "_temp")}}
And now that we have those set, we can update the target temp for the zone
1
2
3
4
5
6
7
actions:
  - alias: Assign the temp to the zone's target
    action: input_number.set_value
    target:
        entity_id: "{{ target_zone }}"
    data:
        value: "{{ target_temp }}"
That was a lot; here’s what it looks like all together:
1
2
3
4
5
6
7
8
9
10
11
12
13
14
15
16
17
18
19
20
21
22
23
24
25
26
27
28
29
30
31
32
33
34
35
36
37
38
39
40
41
42
43
44
45
46
47
automation:
  - id: update_upstairs_target_temp
    alias: Climate - Update Upstairs Target Temp
    mode: queued
    description: >-
      Whenever one of the monitored target temps changes, update the aggregate
      target temperature

    triggers:
      - alias: If the office target temp schedule changes
        trigger: calendar
        event: start
        id: office
        entity_id: "calendar.office_climate"

      - alias: If the office target temp schedule changes
        trigger: calendar
        event: end
        id: office
        entity_id: "calendar.office_climate"

    conditions: []

    actions:
      - alias: Get the mode from the calendar event which triggered the automation
        variables:
          target_mode: >-
            {% if trigger.calendar_event == "end" %}
              default
            {% else %}
              {{ trigger.calendar_event.summary | lower }}
            {% endif %}
          target_zone: >-
            {% set zones = {
              "office": "input_number.office_target_temp"
            }
            %}
            {{ zones.get(trigger.id) }}
          target_temp: >-
              {{ states("input_number.climate_" + target_mode + "_temp")}}

      - alias: Assign the temp to the zone's target
        action: input_number.set_value
        target:
          entity_id: "{{ target_zone }}"
        data:
          value: "{{ target_temp }}"
At this point, you’ll see the target temperatures for whatever zones you’ve created being updated to the temps defined by the settings at the times which the calendar indicates.
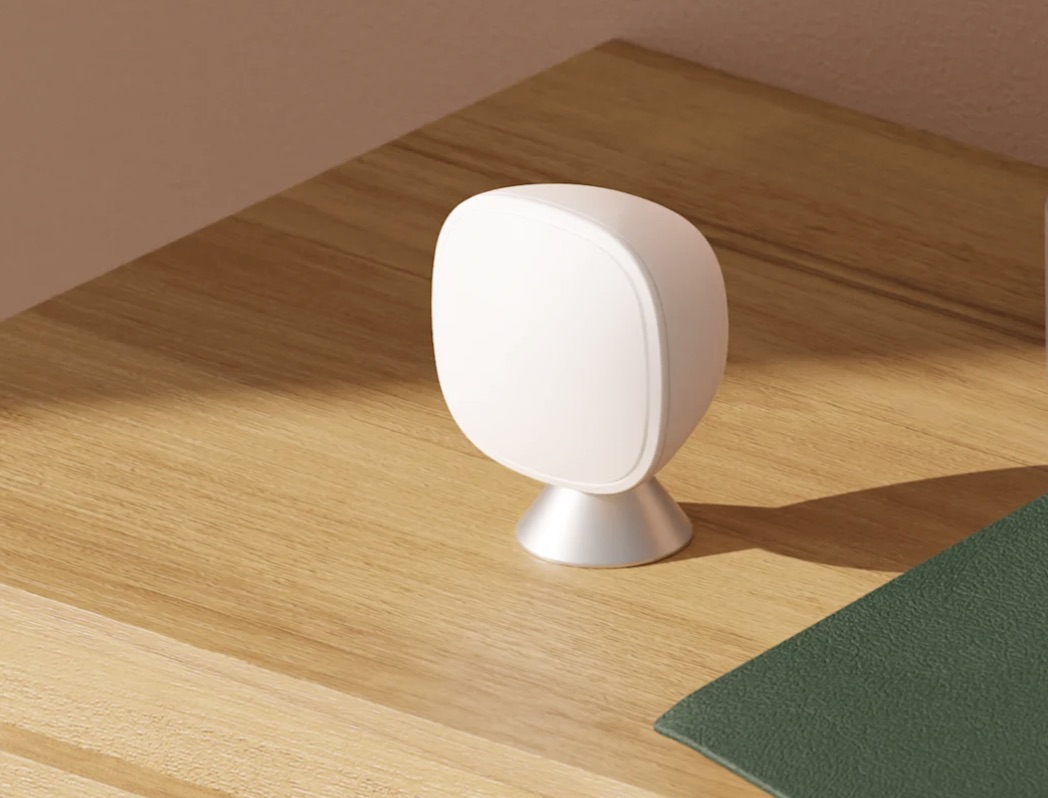
Adjustible manually without an app
This isn’t something that I’ve been able to get to a good solution on; still working through the best way to handle it. What I’d really like is to have a separate thermostat-like device in each room which displays and can change the room’s target temperature; however I haven’t found many good solutions. This one is the closest I’ve found and I kinda hate the look of it, and it’s not cheap.
Without separate devices, I’d have to detect when the thermostat changes (which… uh, changes the thermostat), update the target temperature locally for some period of time, then time it out, but figure out how to do that for all zones rather than one device per zone. So for now, I’ve just added a switch that makes the system go to manual mode rather than automatic; if we want to manually control things, we just turn off automatic mode then set to whatever temp we want.
1
2
3
4
input_boolean:
  hvac_manual_mode:
    name: HVAC Manual Mode
    icon: mdi:hvac-off
Then use that as a condition in the automation above like so:
1
2
3
4
5
conditions:
  - alias: HVAC is in automatic mode
    condition: state
    entity_id: input_boolean.hvac_manual_mode
    state: "off"
Disables HVAC if windows are open
This is where we introduce our first physical sensors, namely window sensors. The idea here is that we need to know if windows are open because, if they are, then we are not going to allow the system to operate. Personally, I have the Aqara Door and Window Sensors on all my windows and some doors and I think they’re great; easy on battery, easy to install, small and unobtrusive.

These are integrated into Home Assistant using Zigbee2Mqtt which I like much better than the ZHA built into Home Assistant, and I have a corresponding binary_sensor for each window stating whether it’s open.
I then grouped all of the windows into a single group so it’s easier to use in automations; this way you only have to check one sensor (is any window open) vs many (is the bedroom window open or the office window open or the…).
1
2
3
4
5
6
7
8
binary_sensor:
  - platform: group
    name: Upstairs Windows
    unique_id: upstairs_windows
    device_class: window
    entities:
      - binary_sensor.office_window_sensor_contact
      # list the rest of the window sensors here
The end result is that, if any of the windows listed in the binary_sensor.upstairs_windows group is open, the state of that sensor will be on (aka “open”); if all of them are closed, then the sensor will be off (aka “closed”).
Because I’m aiming for an overengineered solution, I also have a separate sensor which is specifically for determining whether the HVAC system should be disabled. My reasoning is I might want to add additional conditions to make it on or off, but right now it’s just the same value as the above sensor. We’re using a template because we’re doing some logic to determine the state.
1
2
3
4
5
template:
  - binary_sensor:
      - name: Disable Upstairs Climate Operation
        unique_id: upstairs_hvac_disabled
        state: "{{ is_state('binary_sensor.upstairs_windows', 'on') }}"
The end result of this is that, if there are windows open, then the upstairs_hvac_disabled is on, meaning we should disable the HVAC.
Now to get into automating the system turning on/off. First, we’ll have two triggers. The first trigger is when the above sensor is changed; every time we detect a change there, we should take the appropriate action
1
2
3
4
5
6
7
triggers:
  - alias: Whenever the state of Disable Upstairs Climate Operation changes
    trigger: state
    entity_id: binary_sensor.disable_upstairs_climate_operation
    to:
        - "off"
        - "on"
We also want to watch the state of manual/auto mode switch we had above; if in manual mode, we don’t want to be playing with the HVAC at all, but when it goes back in auto, we should check to see if the windows are open before turning on the HVAC system.
1
2
3
4
5
6
triggers:
  - alias: Whenever we switch the HVAC Manual Mode switch to off
    trigger: state
    entity_id: input_boolean.hvac_manual_mode
    to:
      - "off"
This time we’ll have a condition: we should only do this update when the HVAC system is in manual mode.
1
2
3
4
5
conditions:
  - alias: When the HVAC is not in manual mode
    condition: state
    entity_id: input_boolean.hvac_manual_mode
    state: "off"
Now we’re going to have a choice to make. If the system is disabled according to the sensor, then we want to turn the thermostat off; we know this is the right action because the inputs (disabled switch and/or manual mode) just changed. However, if the system is not disabled, then we want to turn the thermostat back on.
1
2
3
4
5
6
7
8
9
10
11
12
13
14
15
16
17
18
19
20
actions:
  - alias: Change the mode of the HVAC system depending on the current state
    choose:
      - conditions:
          - alias: If the disable entity is on
            condition: state
            entity_id: binary_sensor.disable_upstairs_climate_operation
            state: "on"
        sequence:
          - alias: Turn the climate control off
            action: climate.turn_off
            target:
              entity_id: climate.upstairs_thermostat_home_kit

    default:
      sequence:
        - alias: Turn the climate control on
          action: climate.turn_on
          target:
            entity_id: climate.upstairs_thermostat_home_kit
One note: when my thermostat comes back on, it always comes back on in Heat/Cool mode, which I never use; we only ever use Heat or Cool. Therefore, I created a separate input_select entity which will contain the desired state of the thermostat. I could get the current mode from the thermostat and update the entity before I turn the thermostat off, but instead I just have the selection in a Home Assistant dashboard since I only change it twice a year.
1
2
3
4
5
6
7
8
input_select:
  hvac_mode:
    name: HVAC Mode
    options:
      - heat
      - cool
      - heat_cool
    icon: mdi:hvac
And then I have this additional action in the default branch:
1
2
3
4
5
6
- alias: Set the climate control to the mode we have configured
  action: climate.set_hvac_mode
  target:
    entity_id: climate.upstairs_thermostat_home_kit
  data:
    hvac_mode: '{{ states("input_select.hvac_mode") }}'
(If you haven’t guessed, I talk to my upstairs thermostat through the HomeKit integration; it’s much faster than the native integration).
Putting it all together:
1
2
3
4
5
6
7
8
9
10
11
12
13
14
15
16
17
18
19
20
21
22
23
24
25
26
27
28
29
30
31
32
33
34
35
36
37
38
39
40
41
42
43
44
45
46
47
48
49
50
51
52
automation:
  - id: toggle_upstairs_climate_with_openings
    alias: Climate - Toggle Upstairs Climate With Openings
    description: Turns on/off the upstairs climate control when windows/doors open or close

    triggers:
      - alias: Whenever the state of Disable Upstairs Climate Operation changes
        trigger: state
        entity_id: binary_sensor.disable_upstairs_climate_operation
        to:
          - "off"
          - "on"

      - alias: Whenever we switch the HVAC Manual Mode switch to off
        trigger: state
        entity_id: input_boolean.hvac_manual_mode
        to:
          - "off"

    conditions:
      - alias: When the HVAC is not in manual mode
        condition: state
        entity_id: input_boolean.hvac_manual_mode
        state: "off"

    actions:
      - alias: Change the mode of the HVAC system depending on the current state
        choose:
          - conditions:
              - alias: If the disable entity is on
                condition: state
                entity_id: binary_sensor.disable_upstairs_climate_operation
                state: "on"
            sequence:
              - alias: Turn the climate control off
                action: climate.turn_off
                target:
                  entity_id: climate.upstairs_thermostat_home_kit

        default:
          sequence:
            - alias: Turn the climate control on
              action: climate.turn_on
              target:
                entity_id: climate.upstairs_thermostat_home_kit

            - alias: Set the climate control to the mode we have configured
              action: climate.set_hvac_mode
              target:
                entity_id: climate.upstairs_thermostat_home_kit
              data:
                hvac_mode: '{{ states("input_select.hvac_mode") }}'
So now the system will turn off when you open a window and turn back on when you close it. Neat, huh?
Balanced cooling
For this we’re going to require some more sensors, this time temperature sensors in the rooms we want to control. There’s a bunch of them on the market, so take your pick. I used to use (and still use elsewhere) Aqara temperature/humidity sensors; just like the window sensors, they’re small, effective, and good with battery.

However, in an attempt to not have to build out this whole HVAC control system in Home Assistant (heh, that turnd out well), I got the room sensors from Ecobee because they’re built to work directly with my thermostat. Like the Aqara sensors, these monitor temperature, but they don’t do humidity; however, they do monitor room occupancy, which will come in handy later on.
With the temperature sensors integrated into Home Assistant, we’ve got all the sensors we need to do the balanced cooling.
Nice-to-Haves
Haven’t we covered enough? Seriously, nice-to-haves are just that: nice to have, but not required. We’ll cover at least some of this stuff later in this series… but that’s as I get to it, which itself is not guaranteed.
Next Steps
As this post was all about getting the prerequisites out of the way, we’re now prepared to start controlling the HVAC itself. And that will be the subject of the next post, diving into how to do it and why we do some of the…. interesting things we have to do to get there.
Thanks for reading!